Service
Table of contents
Service 를 사용하면 파드가 클러스터 안 어디에 있던 고정 IP 주소 를 통해서 접근할 수 있다.
서비스는 아래와 같이 세가지의 타입이 있다.
ClusterIP
기본 서비스 타입으로 클러스터 내부에서만 사용가능하며 외부에서는 사용할 수 없다.
Deployment 실행하기
kubectl apply -f hostname-server.yaml 을 통해 파드를 생성한다.
root@master:~/labfile/service# cat hostname-server.yaml
apiVersion: apps/v1
kind: Deployment
metadata:
  name: hostname-server
  labels:
    app: hostname-server
spec:
  replicas: 2
  selector:
    matchLabels:
      app: hostname-server
  template:
    metadata:
      labels:
        app: hostname-server
    spec:
      containers:
      - name: hostname-server
        image: takytaky/hostname
        ports:
        - containerPort: 80
root@master:~/labfile/service#

root@master:~/labfile/service#
root@master:~/labfile/service# kubectl apply -f hostname-server.yaml
deployment.apps/hostname-server created
root@master:~/labfile/service#
두 worker 노드에 172.16.189.89, 172.16.235.162 로 파드가 생성되었다.
Every 1.0s: kubectl get svc,deploy,pods -o wide                                                        master: Sun Jan 15 02:23:53 2023

NAME                 TYPE        CLUSTER-IP   EXTERNAL-IP   PORT(S)   AGE     SELECTOR
service/kubernetes   ClusterIP   10.96.0.1    <none>        443/TCP   2d12h   <none>

NAME                              READY   UP-TO-DATE   AVAILABLE   AGE     CONTAINERS        IMAGES              SELECTOR
deployment.apps/hostname-server   2/2     2            2           2m58s   hostname-server   takytaky/hostname   app=hostname-server

NAME                                   READY   STATUS    RESTARTS   AGE     IP               NODE      NOMINATED NODE   READINESS GATES
pod/hostname-server-7c85cc96dc-2j9lv   1/1     Running   0          2m58s   172.16.189.89    worker2   <none>           <none>
pod/hostname-server-7c85cc96dc-gbvd8   1/1     Running   0          2m58s   172.16.235.162   worker1   <none>           <none>
연결 확인 (curl -sf http://172.16.189.89 | grep Hello)
root@master:~/labfile/service# curl -sf http://172.16.189.89 | grep Hello
        <p>Hello,  hostname-server-7c85cc96dc-2j9lv</p> </blockquote>
root@master:~/labfile/service#
root@master:~/labfile/service# curl -sf http://172.16.235.162 | grep Hello
        <p>Hello,  hostname-server-7c85cc96dc-gbvd8</p> </blockquote>
root@master:~/labfile/service#
서비스 생성하기 (spec > type : ClusterIP)
root@master:~/labfile/service# cat clusterip-hostname.yaml
apiVersion: v1
kind: Service
metadata:
  name: clusterip-hostname-service
spec:
  type: ClusterIP
  selector:
    app: hostname-server
  ports:
  - protocol: TCP
    port: 80
    targetPort: 80
root@master:~/labfile/service#
root@master:~/labfile/service#

root@master:~/labfile/service# kubectl apply -f clusterip-hostname.yaml
service/clusterip-hostname-service created
서비스 추가 확인하기
 Every 1.0s: kubectl get svc,deploy,pods -o wide                                                        master: Sun Jan 15 02:27:33 2023

NAME                                 TYPE        CLUSTER-IP      EXTERNAL-IP   PORT(S)   AGE     SELECTOR
service/clusterip-hostname-service   ClusterIP   10.105.74.121   <none>        80/TCP    74s     app=hostname-server
service/kubernetes                   ClusterIP   10.96.0.1       <none>        443/TCP   2d12h   <none>

NAME                              READY   UP-TO-DATE   AVAILABLE   AGE     CONTAINERS        IMAGES              SELECTOR
deployment.apps/hostname-server   2/2     2            2           6m39s   hostname-server   takytaky/hostname   app=hostname-server

NAME                                   READY   STATUS    RESTARTS   AGE     IP               NODE      NOMINATED NODE   READINESS GATES
pod/hostname-server-7c85cc96dc-2j9lv   1/1     Running   0          6m39s   172.16.189.89    worker2   <none>           <none>
pod/hostname-server-7c85cc96dc-gbvd8   1/1     Running   0          6m39s   172.16.235.162   worker1   <none>           <none>
ClusterIP 타입의 서비스 IP 확인한다.
root@master:~/labfile/service#
root@master:~/labfile/service# curl -sf http://10.105.74.121 | grep Hello
        <p>Hello,  hostname-server-7c85cc96dc-gbvd8</p> </blockquote>
root@master:~/labfile/service#
root@master:~/labfile/service# curl -sf http://10.105.74.121 | grep Hello
        <p>Hello,  hostname-server-7c85cc96dc-2j9lv</p> </blockquote>
root@master:~/labfile/service#
실습 정리 해당 서비스 및 deploy 삭제한다.
root@master:~/labfile/service# kubectl delete svc clusterip-hostname-service
service "clusterip-hostname-service" deleted
root@master:~/labfile/service#
root@master:~/labfile/service# curl http://10.105.74.121 | grep Hello^C
root@master:~/labfile/service# kubectl delete deploy hostname-server
deployment.apps "hostname-server" deleted
NodePort
ClusterIP + 노드 포트 번호까지 할당하므로 클러스터 안 뿐만아니라 외부에서도 접근할 수 있따.
파드 생성하기 (hostname-server)
서비스 생성하기 (spec > type : NodePort)
root@master:~/labfile/service# cat nodeport-hostname.yaml
apiVersion: v1
kind: Service
metadata:
  name: nodeport-hostname-service
spec:
  type: NodePort
  selector:
    app: hostname-server
  ports:
  - protocol: TCP
    port: 80
    targetPort: 80
    nodePort: 30080
root@master:~/labfile/service#
root@master:~/labfile/service# kubectl apply -f nodeport-hostname.yaml
service/nodeport-hostname-service created
root@master:~/labfile/service#
root@master:~/labfile/service# cat nodeport-hostname.yaml^C
root@master:~/labfile/service# kubectl apply -f hostname-server.yaml
deployment.apps/hostname-server created
root@master:~/labfile/service# kubectl apply -f nodeport-hostname.yaml
service/nodeport-hostname-service unchanged
root@master:~/labfile/service#
root@master:~/labfile/service# curl -sf http://10.97.128.131 | egrep Hello
        <p>Hello,  hostname-server-7c85cc96dc-95ltj</p> </blockquote>
root@master:~/labfile/service#
pod, service 생성 확인
Every 1.0s: kubectl get svc,deploy,pods -o wide                                                        master: Sun Jan 15 03:02:14 2023

NAME                                TYPE        CLUSTER-IP      EXTERNAL-IP   PORT(S)        AGE     SELECTOR
service/kubernetes                  ClusterIP   10.96.0.1       <none>        443/TCP        2d13h   <none>
service/nodeport-hostname-service   NodePort    10.97.128.131   <none>        80:30080/TCP   8m41s   app=hostname-server

NAME                              READY   UP-TO-DATE   AVAILABLE   AGE     CONTAINERS        IMAGES              SELECTOR
deployment.apps/hostname-server   2/2     2            2           7m55s   hostname-server   takytaky/hostname   app=hostname-server

NAME                                   READY   STATUS    RESTARTS   AGE     IP               NODE      NOMINATED NODE   READINESS GATES
pod/hostname-server-7c85cc96dc-95ltj   1/1     Running   0          7m55s   172.16.189.90    worker2   <none>           <none>
pod/hostname-server-7c85cc96dc-fv42w   1/1     Running   0          7m55s   172.16.235.164   worker1   <none>           <none>
네트워크 환경 세팅하기
Oracle VM VirtualBox  관리자
파일
    --> 환경설정
    --> 네트워크 --> NatNetwork --> 톱니바퀴 (설정) --> 포트포워딩
    --> [+]   (다음 항목 추가)

    이름       프로토콜         호스트IP          호스트 포트           게스트IP                게스트포트
    nodeport      TCP       192.168.56.1    30080        192.168.137.101           30080
    loadbalancer TCP        192.168.56.1    80       192.168.137.200           80
외부에서 접속하기
아래 ip 로 접속확인한다.
| [##_Image | kage@cNK1FM/btsjnG3cPea/GHzVGkANwjdVRfgOCld2YK/img.png | CDM | 1.3 | {“originWidth”:800,”originHeight”:258,”style”:”alignLeft”}_##] |
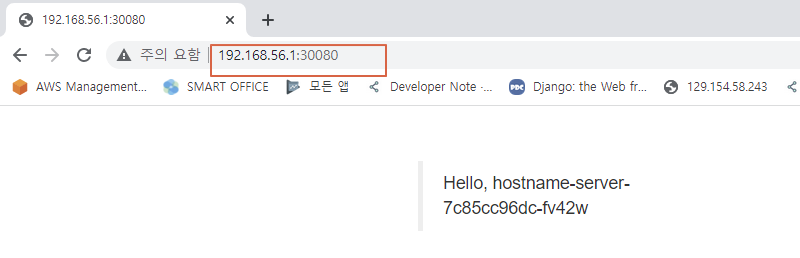
로컬에서 접속하기
테스트 시 쿠버네티스를 설치한 로컬에서 접속이 필요한 경우 NodePort 상태에서는 아래와 같이 접속할 수 있다.
kubectl get node -o wide 를 통해 node 의 INTERNAL-IP 를 확인한다.
dcpark@dcpark-500R5K-501R5K-500R5Q:~/helm-test/hello-helm/charts$ kubectl get node -o wide
NAME       STATUS   ROLES           AGE   VERSION   INTERNAL-IP    EXTERNAL-IP   OS-IMAGE             KERNEL-VERSION       CONTAINER-RUNTIME
minikube   Ready    control-plane   30d   v1.28.3   192.168.49.2   <none>        Ubuntu 22.04.3 LTS   5.15.0-100-generic   docker://24.0.7
dcpark@dcpark-500R5K-501R5K-500R5Q:~/helm-test/hello-helm/charts$
해당 파드를 조회하여 Target Port 를 확인한다.
dcpark@dcpark-500R5K-501R5K-500R5Q:~/helm-test/hello-helm/charts$
dcpark@dcpark-500R5K-501R5K-500R5Q:~/helm-test/hello-helm/charts$ kubectl get svc -A
NAMESPACE              NAME                        TYPE        CLUSTER-IP      EXTERNAL-IP   PORT(S)                  AGE
default                kubernetes                  ClusterIP   10.96.0.1       <none>        443/TCP                  16d
default                testhelm-hello-helm         NodePort    10.100.230.96   <none>        80:30823/TCP             5m48s
kube-system            kube-dns                    ClusterIP   10.96.0.10      <none>        53/UDP,53/TCP,9153/TCP   30d
kubernetes-dashboard   dashboard-metrics-scraper   ClusterIP   10.105.75.95    <none>        8000/TCP                 30d
kubernetes-dashboard   kubernetes-dashboard        ClusterIP   10.100.155.51   <none>        80/TCP                   30d
dcpark@dcpark-500R5K-501R5K-500R5Q:~/helm-test/hello-helm/charts$
아래와 같이 브라우저에서 접속한다.
192.168.49.2:30823
서비스 삭제
테스트 이후 서비스 삭제한다.
kubectl delete svc nodeport-hostname-service
NodeBalancer
가장 많은 기능을 가진 타입이다. (참고 : https://metallb.universe.tf/installation )
To install MetalLB, apply the manifest:
# kubectl apply -f https://raw.githubusercontent.com/metallb/metallb/v0.12.1/manifests/namespace.yaml
# kubectl apply -f https://raw.githubusercontent.com/metallb/metallb/v0.12.1/manifests/metallb.yaml


# kubectl get pods -n metallb-system
1) The metallb-system/controller deployment. This is the cluster-wide controller that handles IP address assignments. 2) The metallb-system/speaker daemonset. This is the component that speaks the protocol(s) of your choice to make the services reachable. Service accounts for the controller and speaker, along with the RBAC permissions that the components need to function.
LoadBalancer 의 IP 정보 구성
# cat metallb-ip-config.yaml
apiVersion: v1
kind: ConfigMap
metadata:
  namespace: metallb-system
  name: config
data:
  config: |
    address-pools:
    - name: my-ip
      protocol: layer2
      addresses:
      - 192.168.137.200-192.168.137.209

# kubectl apply -f metallb-ip-config.yaml

# cat  loadbalancer-hostname.yaml
apiVersion: v1
kind: Service
metadata:
  name: loadbalancer-hostname-service
spec:
  type: LoadBalancer
  selector:
    app: hostname-server
  ports:
  - protocol: TCP
    port: 80
    targetPort: 80

# kubectl apply -f loadbalancer-hostname.yaml

# curl -sf http://192.168.137.200 | grep Hello
실습 정리
kubectl delete svc nodeport-hostname-servicekubectl delete svc loadbalancer-hostname-servicekubectl delete deploy hostname-server